Render and assign materials
Render
The first thing we need to do is to create a RenderGraph.
If there is no existing RenderGraph in the scene it will become the main one and therefore will drive the rendering of all passes.
Otherwise,
By default a RenderGraph comes with a minimalistic graph that performs some work. For the sake of clarity, we will erase the nodes inside and start from scratch.
Let's create the most basic graph that renders all the scene primitives into the layer of the pass.
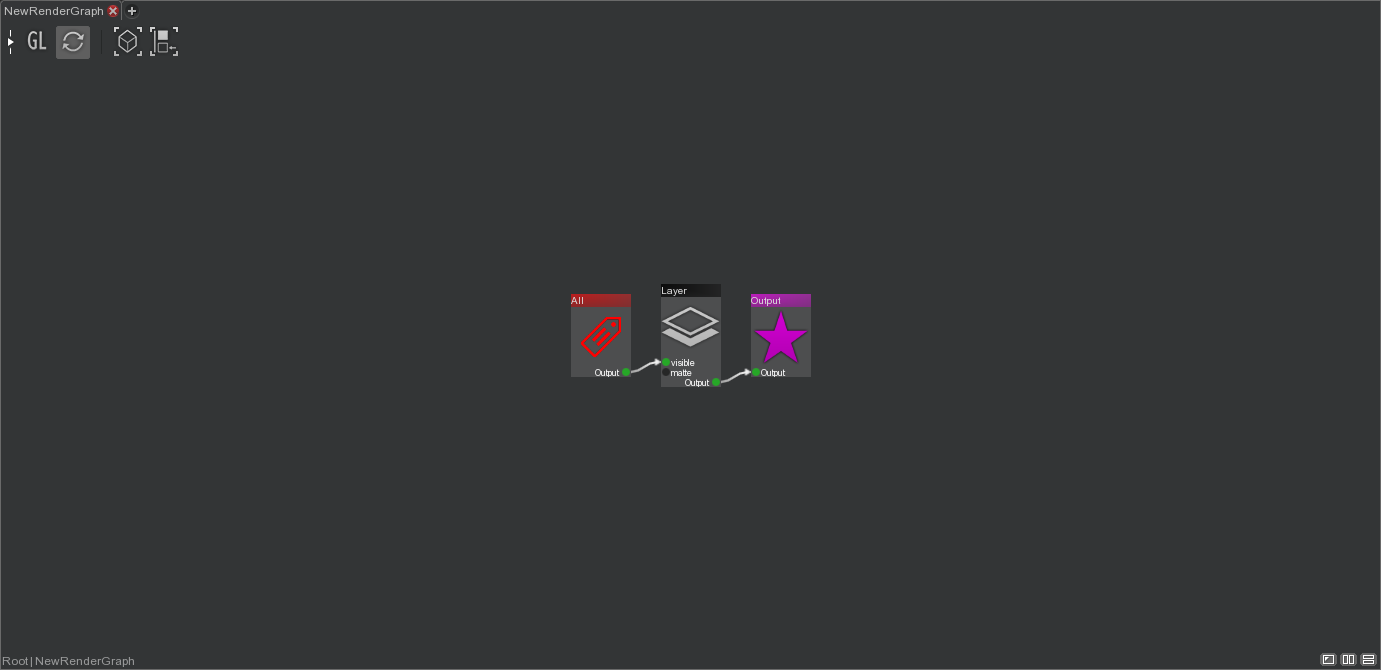
Create a new RenderGraph.- Drill down in the NewRenderGraph, select all the nodes and delete them.
- Create a Tag node, a Layer node and an Output node and connect them as in the graph below.
- Select the Tag node and type 'All' in the Tag text box of a properties view.
- Select the Layer node and type 'All' in the Render Layer text box of a properties view.
- Render the image.
  |
All the primitives are rendered in black since none of them have a material. Change the Alpha Mode in the Render view or the color in 'Render Settings > Debug > Default Surface Color' of the pass to better see the primitives.
This RenderGraph can be explained like this :
The Tag node selects all the primitives in the scene, since its Tag is 'All' and every scene graph node own the 'All' tag. The Tag node is connected to the Layer node which renders the selection in the Layer of the RenderPass, since its Render Layer is 'All' and the Layer has 'All' in its Layer Set. Finally the Layer node is connected to the Output node meaning that the graph will be evaluated and rendered.
Assign a material
Let's assign a material to all primitives that just returns the normal of the surface. This could perfectly be used in production for debugging a scene.
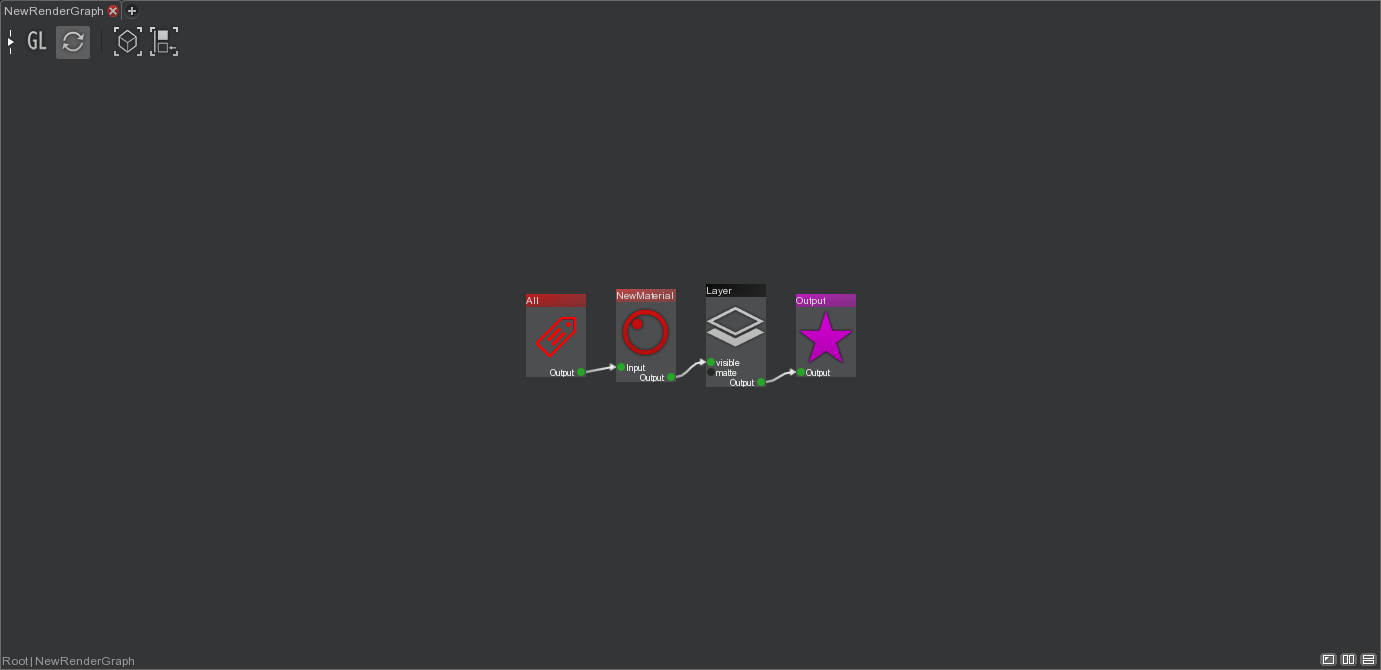
- Create a new material that returns the normal of the surface.
- Drill down into the previous NewRenderGraph.
- Create a Shader node and connect it as in the graph below.
- Select the Shader node and select NewMaterial in the Shader combo box.
- Render the image.
 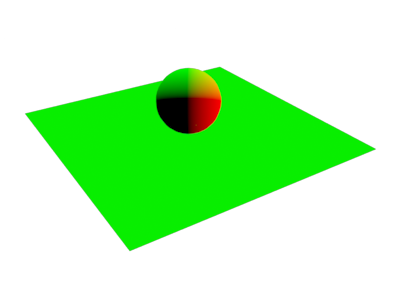 |
All the primitives are rendered using their normal as final color.
This RenderGraph can be explained like this :
The Tag node selects all the primitives in the scene, since its Tag is 'All' and every scene graph node own the 'All' tag. The Tag node is connected to the NewMaterial node, which assign the NewMaterial to the selection since its Mode is 'Set Material' and Shader is NewMaterial. The NewMaterial node is connected to the Layer node which renders the selection in the Layer of the RenderPass, since its Render Layer is 'All' and the Layer has 'All' in its Layer Set. Finally the Layer node is connected to the Output node meaning that the graph will be evaluated and rendered.
Assign a physically based material
Let's assign a physically based matte material to all primitives in the scene. In order the shading, lighting and shadowing to be physically correct the RenderGraph requires two new nodes. Those nodes are Set nodes whose goal is to perform association between a scene graph node and a string. The string is just a keyword used by lights in the scene to specify how they are going to interact with node surfaces : light or not a node, cast a shadow or not for a node, diffuse light or not on a node, etc. This approach of modeling primitives and lights interaction is very flexible since you will be able to tweak it in depth, depending your production needs.
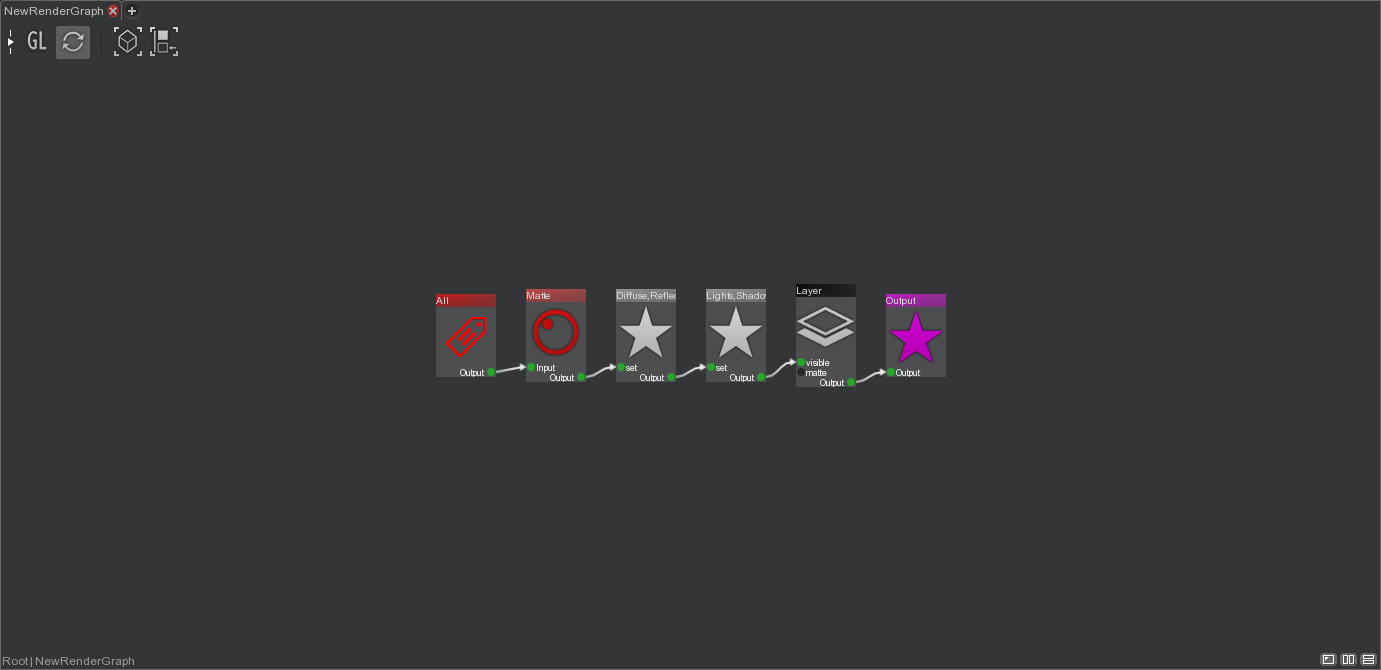
Use the Matte material of the library.Drill down into the previous NewRenderGraph.Create a Matte material node.- Create two Set nodes and
connect them as in the graph below. - Select the left Set node and select Diffuse, Reflection and Refraction in the Set combo checkbox.
- Select the right Set node and select Lights and Shadows in the Set combo checkbox.
- Render the image.
 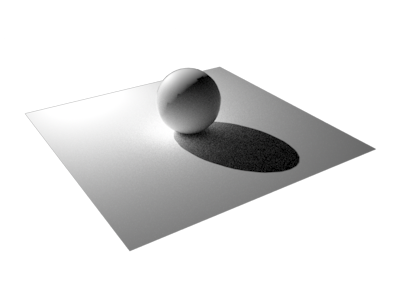 |
All the primitives are rendered using a matte physically correct shading and all primitives are casting shadows according to the area light parameters.
This RenderGraph can be explained like this :
The Tag node selects all the primitives in the scene, since its Tag is 'All' and every scene graph node own the 'All' tag. The Tag node is connected to the Shader node, which assign the Matte material to the selection since its Mode is 'Set Material' and Shader is Matte. The Shader node is connected to the left Set node, which diffuse, reflect and refract light on the selection, since its Set is 'Diffuse', 'Reflection' and 'Refraction' and the Matte material has 'Diffuse', 'Reflection' and 'Refraction' in its Diffuse, Specular and Refraction Trace Set of its Microfacet node. The left Set node is connected to the right Set node which light the selection and make the selection cast shadow, since in its Set is 'Lights' and 'Shadows' and the AreaLight in the scene has 'Lights' and 'Shadows' in Light Set and Shadow Set. The right Set node is connected to the Layer node which renders the selection in the Layer of the RenderPass, since its Render Layer is 'All' and the Layer has 'All' in its Layer Set. Finally the Layer node is connected to the Output node meaning that the graph will be evaluated and rendered.